Mastering Light Control with My Sony A9 III: A Fun Bird Photography Adventure!


Hey there, lately I’ve been digging into the world of lighting a bit more, and let me tell you, it’s been a fun exercise for my bird photography. With everything going on outside, like the EEE threat that’s got us all cautious about being outdoors, I figured it was time to get creative and not limit myself to shooting only during the golden hour when it is the most dangerous to get bitten by those pesky mosquitoes! After binge-watching YouTube videos, (I really liked this one) I realized my Sony A9 III is pretty awesome when it comes to handling flash in tricky conditions. So, I decided to put it to the test!
Why the Sony A9 III Rocks for Flash Photography
First off, let’s talk about why this camera is such a gem. This is my 4th Sony. I still own the Sony A7R5, but this is by far my favorite camera to date.
The Sony A9 III has this amazing global shutter feature which means all the pixels on the sensor capture light at the same time. (This technology is new for consumer-level still cameras, and as of now, no other major camera manufacturer has released a competing product with a global shutter).
This feature is super cool because:
Flash Sync at Any Speed: You can sync your flash even at crazy fast shutter speeds—up to 1/80,000 second! This means you can shoot in bright daylight without any worries.
No Distortion: If you’re trying to capture fast-moving birds, this feature means you won’t get that weird distortion you sometimes see with other cameras.
Even Exposure: Every part of your image gets the same amount of light, which is a huge plus!
My Lighting Setup:
So, I decided to give this a shot with a simple setup. Here’s what I used:
Flash: A Godox AD200 flash—lightweight and powerful!
Diffuser: I added a magbox diffuser to soften the light and make it look more natural.
Trigger: A Flashpoint trigger to connect everything seamlessly.
The Adventure Begins!
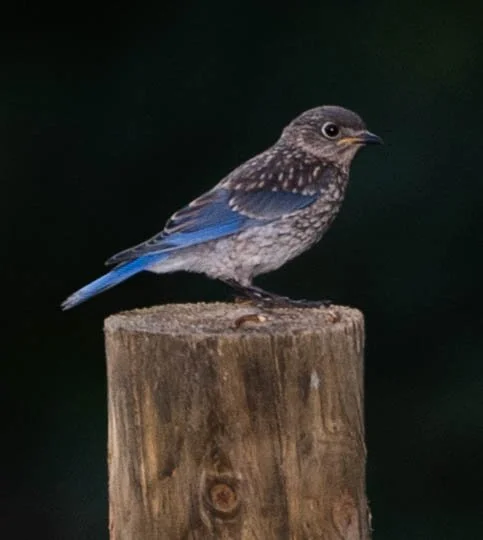
Baiting the Birds: I set up a perch in a field and used some bait to lure in the birds. Gotta do what you gotta do, right? 😉
Camera Setup: I ignored a tripod (I am shooting at very fast shutter speeds, what can go wrong? Honestly, I would recommend a tripod, but I was lazy. I sat on a tractor, aimed at the perch ready to go.
Camera Settings: I set my camera to 1/2000 second, f/2.8, and ISO 250 (which is the sweet spot for this camera, according to Sony). With the A9 III, you don't need to worry about high-speed sync anymore. You can use your flash at any shutter speed you want, without any special settings or loss of flash power.
Flash Power: I set the flash to 1/32 +0.3 to get just the right amount of light on my feathered friends.
Hands-Off Approach: Once everything was set, I didn’t touch the camera again. I let the flash do its thing!
The Results Are In!
I was so excited to see the results! This setup allowed me to capture bird images any time of day, without being limited to that perfect light. The global shutter really helped freeze the action, and I ended up with sharp, dramatic lit shots.This whole experience has shown me that I can create amazing lighting conditions without waiting for the sun to set. Plus, it’s been super helpful given the current situation outside.So, if you’re looking to expand your photography skills, I definitely recommend experimenting with artificial lighting. It’s a fun way to get creative and adapt to whatever nature throws your way!Remember, practice makes perfect, and each time you shoot is a chance to learn something new. Happy shooting, everyone!
I will be using this method for portrait photography in the setting sun next. I will let you know how it goes!